This week I continue to step away from my usual shamanic concerns to talk about my other great passion, photography. Specifically, my journey into applying for and being awarded the Royal Photographic Society’s Licentiate Distinction.
In this instalment, I’ll tell you about how you can finalise your panel. I will also offer a few tips for success. Finally, in Part 4, I’ll look at how you apply and the assessment process.
Part 3: Finalising
Your Panel

A Complimentary Panel
In picking your favourite photographs, please do not lose sight of the panel ‘as a whole’. I am afraid that you have to be ruthless about this. If a favourite photograph does not look right in the panel, find something else.
So what is better about the final panel (above) than that submitted for the Advisory Day (see Part 2, link here)? Firstly, I’ve used a better template (not the RPS one but much closer to it) and the photos are of a uniform size.
In addition, the panel is ‘balanced’ in several ways –
Colour or Monochrome?
It is fine to use a mix of colour and monochrome images in a LRPS application. However, you still have to show that you have carefully considered where to place them within your panel. Thus, in my panel, black and white photographs are on the top row, with colour photographs on the second row.
Portrait or Landscape?
There is no issue with selecting a mixture of portrait, landscape or even square formats. In selecting your favourite photographs, however, you have to bear in mind how they will fit into your panel. Thus, in my panel, portrait photographs are on the top row, with a central landscape photograph; landscape photos are on the bottom row, with a central portrait photograph.
Having to select complimentary formats might mean that you have to make some hard choices. So, for me, this necessitated re-cropping my portrait picture of a meerkat (Image 6) as a landscape, in order to match the orientation of the tiger (Image 10). This was not ideal but it might be a sacrifice you also consider, in order to retain a favourite photograph.
How do your images draw your viewer’s eye?
As far as possible, choose photographs which walk your viewer into the panel, rather than out of it. Thus, in my panel, in the top row, the skater jumps into the panel in Image 1. This is paired with the image at the other end of the row, with the boy walking into the photo in Image 5. Whereas, on the bottom row, the meerkat is positioned on the left in Image 2. The tiger is positioned to the right in Image 10.
How do you balance your images?
At either end, I employed complimentary images. So, there is a single figure in Images 1 and 5, a single animal in Images 6 and 10.
Some experts recommend that you put your strongest images centrally and balanced images in 2 & 4, 7 & 9. I am not sure the central images are my best but they are strong. I certainly sought to balance the images either side. Thus, there is a tall central image in Images 2 and 4, night photography images in 7 and 9
What new photographs did you choose?
I will not address Images 1, 3, 7 & 8, as I discussed those photographs in the previous blog (Part 2, link here). Images 1, 3 & 7 were included in the previous panel and Image 8 was an alternate (Spare 3) from the Advisory Day. However, I think it is worth discussing the new additions and why I included them.
Image 2

I visited Highgate Cemetery, as I knew it would be an atmospheric venue in which to take photographs. Highgate’s East Cemetery is open to anyone but the West Cemetery was only available to view as part of a tour. However, the pandemic has led to them experimenting with advance timed entry tickets for both cemeteries (for more information, check out their website here).
I chose to shoot in black and white, rather than in colour and convert in post (in Lightroom). Usually my advice would be to shoot in colour, just in case you capture something interesting. On this shoot, however, I was certain that I would want to shoot monochrome images and so filmed in ‘Acros’ film simulation. Fuji describes this as producing black and white images which have, ‘rich details with sharpness’.
There are some wonderful memorials in both cemeteries. I think that there is something about the low angle in this shot, making the angel dominate the viewer, which put it on my short list.
Image 4

After a night shoot in the City of London, I found that one of my favourite photographs had juxtaposed the modern architecture of the Lloyd’s Building and the Gherkin, with the St Andrew Undershaft Church. However, I was not happy with the images, so I returned to allow myself another attempt.
Again, I used a long exposure to blur the cars on Leadenhall Street and to best capture the light. Honestly, I cursed when a bag-carrying commuter walked into the middle of the shot. Luckily, however, I loved the resulting ghost-like image, which definitely added a pleasing enigmatic quality to the photograph.
Image 5

I love street photography but I will admit that sometimes my patience is lacking. You really need to cultivate some discipline to stick with a good vantage point and see what comes along. It’s what one of my mentors refers to as ‘fishing’.
The South Bank is a wonderful place to try out some street photography fishing. You are often blessed by some unusual characters, from street entertainers, to tourists, to monocyclists. I spotted this boy, delightfully quirky in his suit. He was leading dogs on his unusual waveboard. I hurried to get into a decent position to photograph him.
I had shot in colour and I was a bit reluctant to lose the bright blue of his suit. However, I needed another monochrome portrait image to fit my panel, so I opted to convert it in Lightroom.
Image 6

London Zoo is a fantastic venue to try your hand at photographing animals or birds. Do not worry if this is totally out of your comfort zone. I did not have much experience with using a zoom lens either. I also felt a bit intimidated by those visitors sporting a lens, often three times the size of mine!
Like street photography, it is often about patience and ‘fishing’. The best shots had some additional element to recommend them – a particular move or glance. Here, I think the sharpness of the fur and the nice bokeh behind the meerkat made it a contender. I also love photographs where the animal looks directly into the camera, creating a sense of personal engagement.
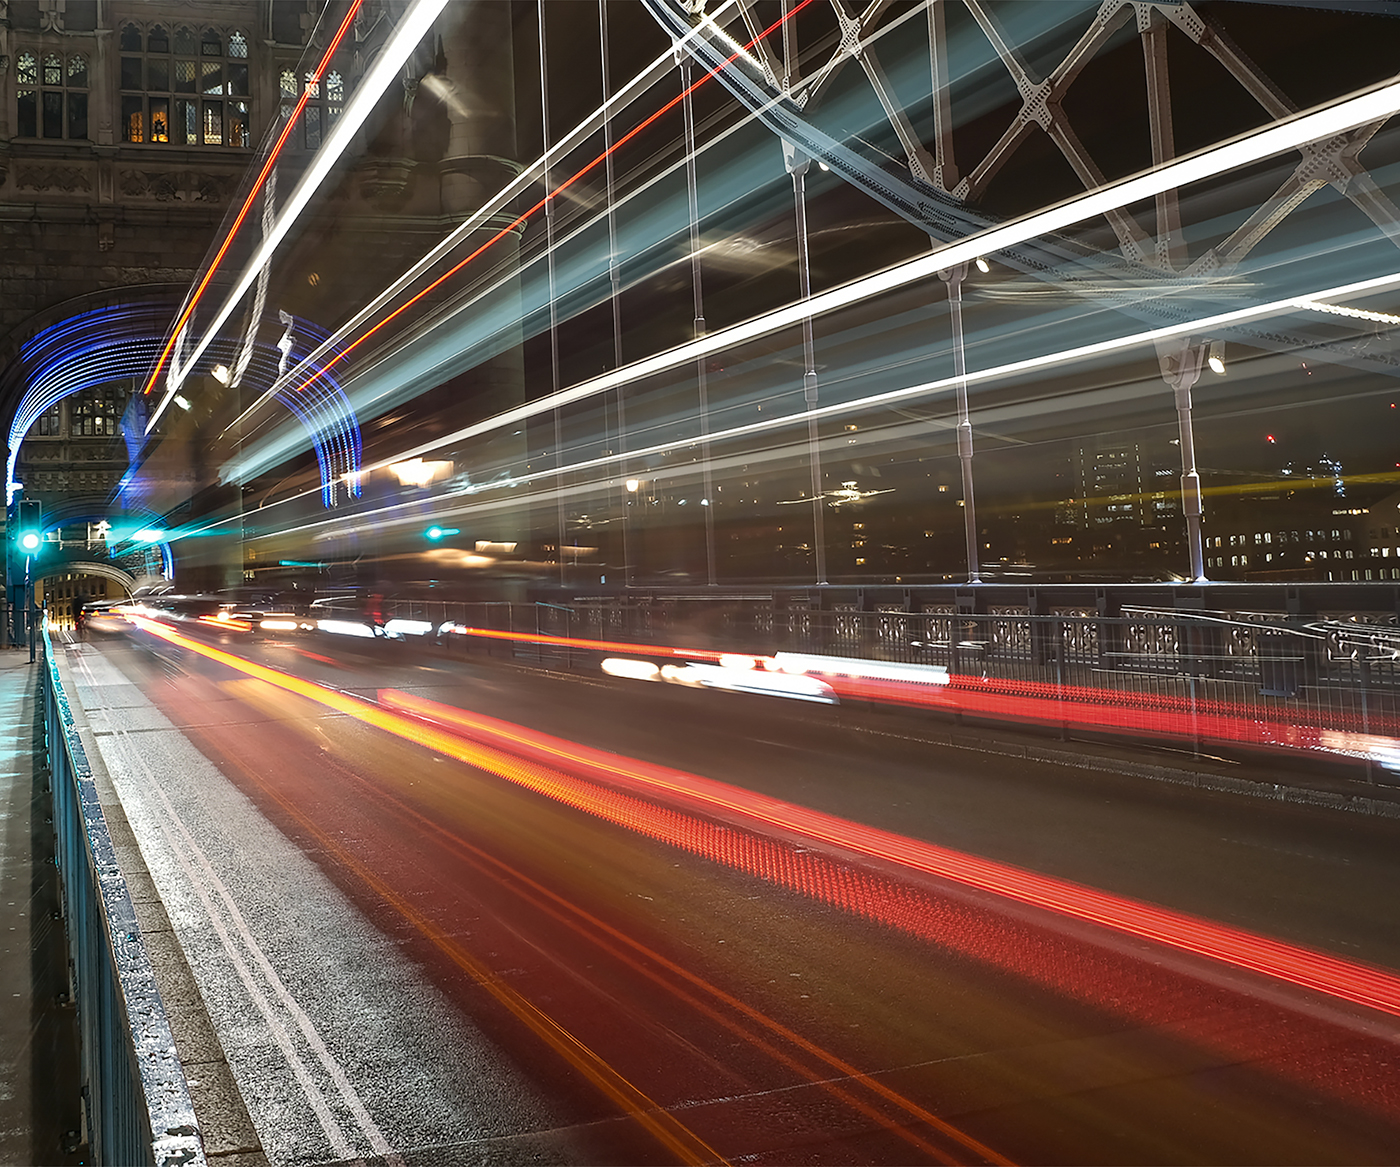
Image 9

This image was from the same night shoot as Spare 2 in my Advisory Day panel (see link, here). I did not like the light trails quite as much in this photograph as Spare 2. Crucially, however, this photograph lacked the spotlight flare of that image.
I think that light trails are a decent way to show the panel your abilities with utilising long exposure. My tip for the top is to use around a 5 second exposure (in addition, I used f8 & ISO 100). Wait for a bus or a lorry, clicking the shutter just as it starts to pass you.
Image 10

I had taken quite a few photographs of London Zoo’s tiger but, just before leaving, I popped back for a final visit. There was a small crowd, gathering in front of this rock, a couple of feet from the viewing window.
I managed to get up close and used my 30mm prime to take a few reasonable shots. This photograph, however, just seemed to have something extra. In fact, the anthropomorphic gesture of despair, head in hands, summed up 2020 pretty well for me!